• When posting, please be aware that artistic nudity is still nudity and not allowed under RpNation rules. Please edit your pictures accordingly!

    Remember to credit artists when using work not your own.

Tutorial πšŒπš›πšŠπšœπš‘ πšŒπš˜πšžπš›πšœπšŽ πŸ’₯ β€” a guide

0: welcome! New

Uxie

ଘ(ΰ©­ΛŠκ’³Λ‹)ΰ©­* ΰ©ˆβ€§β‚Šβ€Λ–Β°


crash course


hi, it's me again! i'm back! let's talk asap...
would you do me a favour and read this ( . .)


welcome to crash course!

here, i'll just be posting quick and quirky mini-tutorials on using and customising code! i know there's a learning curve to using code for the first time because of how much text dump it looks like, and as a coder..... i just don't wanna see stuff break all the time.

therefore, here we are!

a huge disclaimer that i'm self-taught and by no means an expert in css β€” if you're here to learn proper things, i cannot guarantee any of my solutions or explanations are correct, let alone efficient. promise i'm trying my bestest, but i'm just not the cleverest! i'll link some other resources, but do note links are highlighted like
this
so that they're a little easier on the eyes.

feel free to drop any questions, disagreements, and whatnots in this thread too β˜† and ofc, leave a react if you appreciate my stuff. means a lot! mwah


Last edited:
1: the very first step New


crash course


in this episode, we cover:
the very first step


before we do anything, please, please, please,
turn on bbcode editor!!!!

what's that? it's that little button at the top of your post toolbar:
5Ok52t3.png


you'll know you're in bbcode editor mode when it's the only thing highlighted on your toolbar, and everything else is greyed out. i cannot stress the importance of bbcode editor enough, because 60% of the time your code will break if you try posting it in not-bbcode editor (which is also known as RTE. don't ask me what it stands for, i only have guesses. real text editor? readable text editor? idk)

the basic explanation for this is just that your editor will try to fix up a code for you before posting, regardless of what mode you're in. bbcode editor doesn't do a completely fine job of this, but RTE goes absolutely insane with it sometimes if you accidentally deleted a little bit of the freebie's code while you're editing it. to be safe, always edit most of the code in bbcode editor, and post it while you're in bbcode editor mode.

especially if you're using freebies a ton, i'd advise you to just key in some of the formatting on your toolbar manually to avoid having to switch back and forth. you can see below for a list of them, but if you happen to forget you can always just use the function while in RTE, then swap to bbcode editor and see what it is! it's like you know coding already (o*ο½₯Ο‰ο½₯)οΎ‰


click!
basic formatting
[b]this is to bold text[/b] [i]this is for italics[/i] [u]this is for underline[/u] [s]this is for a strikethrough[/s] [size=3]this is for adjusting font sizes[/size] [color=#hex]this is for changing text colours[/color] [font=Font Name]this is for changing fonts[/font] [left][center][right][justify]this is for text alignment[/justify][/right][/center][/left] [url='xx']this is to embed a link in your text[/url] [ispoiler]this is for an inline spoiler[/ispoiler]


little pro-tip: they got rid of the save button a few site versions ago, but you can actually force-save content on your editor, regardless of the mode you're in. just refresh your page, and the editor will lock in whatever content you have in there β€” safer than closing it and hoping auto-save had your back.


Last edited:
2: tags and nesting New


crash course


in this episode, we cover:
tags and nesting


when i say tags, i'm referring to the literally all bbcode on this site, even the non-advanced ones that are covered in the bbcode guide. ngl, this is just going to be a slightly expanded version of the
first post on the bbcode guide
. it's just so important, and will help you most when attempting to debug a broken freebie.

on this site, tags are little functions called out with their names in little square brackets '[ ]' that the site will read and turn into something cool in your final post. the most important thing to know is that every function needs to have an opening and closing tag for it to work properly:


[TAG]your content[/TAG]

your closing tag will always just be the opening tag with a '/' before it. this is a leading reason why codes break, because sometimes people accidentally delete a closing tag or a square bracket here or there. so, if a freebie looks nothing like what it's supposed to be, you probably accidentally deleted something. save your content, ctrl+z, and then be very careful when you do it the second time around. and of course, if you're adding your own bits of formatting into freebie templates, like bolding text or changing colours, remember to close your tags too, or else you'll get situations like:


[/div][font=Roboto][/font][/div][font=Roboto][/font][/div]

it's the result of the editor desperately trying to (and failing) to figure out where to close off the tag for you. even if these don't always break the code β€” which usually has more to do with missing a closing tag or closing it in the wrong order, see nesting below β€” it messes up your code a lot and makes it more difficult to read.

you might have noticed, too, that some tags need additional inputs to work, i.e. putting in a font name or a font size:

[font=FONT NAME]your content, which will come out as FONT NAME[/font] [size=3]your content, which will come out as SIZE 3[/size] [url='xx']your content, which come out embedding the link you put in the tag[/url]

these come after an '=' sign and will not need to be included in your closing tag. huzzah!

you'll notice some coders using inverted commas when they add these inputs, like i did for the link in the example. this isn't necessary, but since these tags are technically HTML (i think?) i've heard it's in good practice to do so. i only do it for links because i'm silly. either way, this is important for you to know since if a freebie template you're editing makes use of inverted commas in their tags, these inverted commas also need to be closed. like, [url='xx'][/url] will work but [url='xx][/url] won't. another thing to look out for when editing!

JUST REMEMBER TO CLOSE THINGS

adding a small section on nesting below, which is more like additional reading than anything but explains a bit on the organisation of tags in complex codes. in my heart of hearts, i'd have loved to include an exercise in closing tags, but i don't have the brain to come up with something good enough quite yet δΊΊ(_ _*)


click!
nesting
nesting essentially refers to using several tags on a single element! this is a proper explanation of it, if you want, but it just means i've got something like this:


[center][font=FONT NAME][size=3]content[/size][/font][/center]

the most important thing to remember for nesting is that you need to close tags in the order they are opened. imagine like a russian doll β€” they all fit together because they're stacked from smallest to largest, and the same idea applies for nesting. in the above example, you'd imagine [size=3][/size] as the smallest russian doll, and [center][/center] as the largest russian doll.

nesting is most important to understand when you're mixing tags, because there's a high tendency for such tags to break if you don't close them in the correct order. the editor will get ANGRY, and start throwing tags wherever they want again!

in complex codes, on the other hand, messing up a nesting order might not affect your code as much because most complex codes will mostly use only one tag, be it divs, borders, or whatever. since all the tags are the same, there basically isn't an order. HOWEVER, because it can be really easy to get confused, it's really good practice to organise your codes with the concept of nesting in mind.

for me, personally, i add three spaces for every level, albeit somewhat arbitrarily which is why my codes do NOT look all that proper. but you'll see stuff like this a lot in mine:


[div=height:50px; width:50px; background:red; padding:10px; box-sizing:border-box;] [div=height:auto; width:auto; background:black;] [div=height:auto; width:auto; color: white;]blah blah[/div] [/div] [/div]

i know fluticasone does it more properly in their codes (they have one div per level, iirc, while i might lump several together) but it helps me keep track of whether all my divs have been closed properly β€” i think it also visualizes the russian doll analogy to some extent! if you're trying to troubleshoot my freebies, you can try figuring out whether you've deleted a div by counting the number of opening div tags on a level and seeing if it matches up with the number of closing div tags. i hope that makes sense!

edit: i forgot about this! line breaks in code like this will affect how it's displayed which is why you either add line-height:0; to your first div or wrap the whole thing in a [nobr][/nobr] tag. both will get rid of line breaks within your code, but you'll need to add another property or tag respectively to your content too so that the linebreaks are respected where you want it to be.


Last edited:
3: properties + variables New


crash course


in this episode, we cover:
properties + variables


finally... we're getting to the bits that more people will benefit from!

some background on the complex bbcoding on RPN is that the reason why they get to be so complicated is thanks to CSS injection. CSS is a language used in coding to style HTML elements, and they use things called properties to make things pretty. you'll notice most complex codes use the div tag, which i feel is best explained like a blank canvas, which you then add stuff onto with CSS properties? idk if that makes sense.

either way, in the following example:

[div= height: 150px; width: 150px; background: red; border: 2px solid black; font-size: 15px; color: #fefefe;] [/div]

everything after [div= is a property, and you'll see they follow the format of property-name: value; each property is closed off with a semi-colon ';', which "closes" off the property.

this is important to know when you make use of variables while customising complex code. you'll probably have stuff like these a lot at the start of many codes:

--bg: #hex; --color-1: #hex; --bg-image: URL('xx');

these are variables! using variables is basically making a little library for your code to refer back to instead of repeating the values manually, and allows you to do stuff like having a consistent colour palette or repeating certain pictures. it also makes customisation a lot easier, since these are usually included at the very top of the code, within the first (and biggest) container div, allowing you (the user) to not have to dig through all the properties to put stuff in yourself.

variables follow a very basic format of two hyphens, the variable name without spaces, and the variable's values:

--variable-name: value;

similar to properties, each variable needs to be closed off with a semi-colon to be read properly, which is important not to miss out when you're editing variables in your codes! you can click below for a bit of additional things on customising some common variables, and making new variables + referencing them.


click!
customising colours
colours in HTML can be input in four forms: a hexcode, rgb values, hsl values, or a name. i think the hexcode is most commonly used, and i'll leave it to
this site
to explain what they are and how they're calculated. tldr; all colours have a hexcode tied to them, and you can refer to a colour by #hexcode! e.g. #ff32e7 is a brilliant shade of neon pink:

rgb and hsl stand for red, green, blue, and hue, saturation, lightness, respectively, and same for hexcodes, each colour has specific rgb/hsl values tied to them. you might see them in codes, however, because of fourth channel it can support β€” the alpha channel, or the opacity/transparency, which is why coders may write rgba/hsla instead (where the a stands for alpha). this allows you to add transparency to your colours, where 0.0 is fully transparent and 1.0 is fully opaque! e.g. rgb(255, 50, 231) is the same shade of neon pink, and rgb(255, 50, 231, 0.5) is the pink at half transparency.

CSS itself has a library of colours it can recognise by name, which you can refer to
here
. it's way easier to just use either of the above forms, though! you get more colours to choose from.

colours in codes could be used for a ton of things, including background colours, border colours, text colours, etc.

click!
customising fonts
customising fonts can be a little trickier, because it requires two steps: calling out the font, and then editing the variable.

RPN is able to access most google fonts, but for it to be used within codes via the property font-family, it first needs to be "called out" by making use of the actual font bbcode tag. you'll see stuff like this at the top of codes, too:


[comment][font=Font Name]font call[/font][/comment] [div= --font: 'Font Name', font-family; ][/div]

therefore, to replace fonts, you need to edit both for it to work properly. take note, also of the capitalisation of the font to make sure it matches the google font's name accurately β€” i can't remember if it actually affects it, but i feel like it does. better safe than sorry!

the second part of the font variable will usually include the font family as well, which refers to the
generic CSS font families
. it's not actually necessary to include, but it provides a back-up for the code to fall back on in case the font doesn't work/load for whatever reason. if you're able to figure out what font-family the font you want to use is, you can also change this part if you like. if not, leaving it won't affect the display of your font in any way.

it's worth noting that using the actual bbcode font tag before your text can also override the variable, if it's something that's easier for you to work with, just like i'm about to randomly throw pixels here. that said, please be careful with closing your tags and doing so at the right places. you can refer to
TAGS AND NESTING
for this.
click!
customising images
easiest of them all! images require just inputting a URL at the variable, just make sure your URL actually directs to the image itself, and not the site the image is hosted on. for pinterest, for example:


--link-one: URL('https://www.pinterest.com/pin/702350504415986686/'); --link-two: URL('https://i.pinimg.com/564x/79/1b/3a/791b3a33b2ce3320ca1817310ad9ae58.jpg');

link one will not work, while link two will. test this out by opening it in a new tab: if the only thing on the tab is your image, it's correct!

an additional layer of customisation can usually be found in the cropping of the image, with the property background-position. it accepts inputs in the form of background-position: value% value%; , where the percentages refer to the positioning in terms of x and y respectively, with 0% as the minimum and 100% as the maximum value. for example, background-position: 0% 100%; will yield an image cropped to the bottom left, while background-position:100% 100%; will yield an image cropped to the bottom right. this will only really work depending on a different property, background-size, and the size of your image β€” if your image does not need to be cropped at all because it fits the element perfectly, these values won't affect anything!

for my codes specifically, i usually leave instructions to adjust the cropping by the relevant div within the code, like so:


[div= --bg-image: URL('xx'); height:50px; width:50px; background: var(--bg-image); background-size:cover; /*edit the following to adjust the cropping of the image*/ background-position:50% 50%; ][/div]

you can usually find these by searching within the page with ctrl+f or whatever browser equivalent with the variable name. on hindsight, this probably isn't the easiest way for this to be accessed, and i should probably change it to a variable. maybe i will.

ANYWAYS, since some codes do not declare a value on this property, however, you can also add these in when editing your variable to save yourself some time cropping it! thanks to the wonders of shorthand properties, this just means adding the percentages on at the end of your variable, like so:


[div= --bg-image: URL('xx') 50% 50%; ][/div]

if background-position is declared in the div itself, however, this will get overridden, unfortunately. so it's always worthwhile to check!

click!
making & referencing variables
making variables is as easy as following the format before, and adding them on below the other variables! do note naming conventions for variables, though: they're case-sensitive, no spaces so use _underscores_ or -hyphens- instead, two variables can't share the same name! in the case of the latter, it'll result in your code only recognising the most recent variable (the one that's in the nearest line from the bottom??), so be careful while choosing names.

**for coders, it should be noted that variables can only be referenced within the specific div it's in, or any nested divs. this is why it's best to put them within the container that your entire code sits within!

referencing variables is also pretty easy, and they can be called out to replace an input in the format 'var(--variable-name)' !! like so:


[div= --bg-color: #49ff71; height:50px; width:50px; /*i'm calling out the variable!!!*/ background: var(--bg-color); ][/div]

make sure you're writing the variable names exactly, given the naming conventions i mentioned above, or else it won't work! you could use this, for example, in place of retyping the colour tag in an in-character post by instead adding a variable and using a div to reference it:


[div= --dialogue: #49ff71; height:50px; width:180px; border:1px solid black; color: #fefefe;]here's some text, and here's [div=display:inline; color: var(--dialogue);]coloured text[/div] [/div]
here's some text, and here's
coloured text


or for my codes, at least, i sometimes ask users to add in their own variables if they want to add in new gallery or relationship or role images. hopefully this helps break it down a little!


Last edited:
4: music players New


crash course


in this episode, we cover:
music players


custom music players are actually really easy to customise, because they're made using the actual embed media tag which is [media=media type][/media]. this one will just cover what kind of links work, because i've had people confused before about why their links weren't working.

some background, the only two types of music players that are available are soundcloud and google drive. no youtube, because it violates youtube TOS to cover up the video or something, and you could use spotify but it only plays a snippet, so, like, why would you do that over a full song on soundcloud or google drive? the important code for music players will look like this:


[media=soundcloud]link[/media] [media=googledrive]file code[/media]

for soundcloud, you need just the link to the song! HOWEVER, be careful dropping in the direct link you get when you click the "share" or "copy link" button under a song:
gk9DzZC.png


because it'll actually give you a link that's still got the UTM parameters attached, which will result in the link NOT working. you'll need to remove the following:
?utm_source=clipboard&utm_medium=text&utm_campaign=social_sharing
from your link first. alternatively, click on the song first to open it to its own page, then copy the link directly from your address bar! slap that between your media tags, and your soundcloud music player should be working! just note that some songs may not be available in other regions, which means some users may not be able to listen to your songs. this is hard to check, and difficult to avoid anyways.

for google drive, you'll need to first upload the song to a google drive and then update the sharing permissions to 'everyone can view'. your permissions should look like this:
LU0zjci.png


afterwards, copy the link, and then take out the file code. this is the string of numbers and letters between /d/ and /view?usp=sharing. put that between your media tags, and yay! it should be working!!


click!
for my codes
i usually include both of soundcloud and google drive music players in my codes to give you some β˜† choice β˜†. this adds an additional step to using music players in my codes, which is hiding the music player you're not using. i add instructions, usually, but i'll explain it anyways in case it's not clear!

here's what my music player code usually looks like:

[comment]----soundcloud (replace the soundcloud link within media tag with your own)----[/comment] [div=height:80px; width:180px; padding:0; margin-top:-16px; margin-left:-14px; position:absolute; top:0; left:0;] [media=soundcloud]soundcloud link[/media] [/div] [comment]----google drive (replace the google file code within media tag with your own)----[/comment] [div=transparent; height:500px; width:500px; margin-top:-170px; margin-left:-93px; padding:0px; /*remove this to use me, and add it to the other*/ display:none;] [media=googledrive]file code[/media] [/div]

the relevant part to look at here is /*remove this to use me, and add it to the other*/ display:none;. this particular string of code will hide the media player it's on, so make sure it's on the one you DON'T want to use and NOT ON the one you're using. and take care not to accidentally delete the closing square bracket!!

click!
music player code snippet
and for my coders, have a snippet! i copy and paste this one snippet for all of my music players with different play button containers β€” i'm sharing it with you too because i'm DONE gatekeeping (there's no logic for me to gatekeep this at all)


Code:
[div=/*this is the main play button container*/ height:auto; width:fit-content; width:-moz-fit-content; position:relative;][div= /*use this div to style your play button!*/ height:auto; width:auto; color: #fefefe; font-size:10px; line-height:100%; position:relative; pointer-events:none;][fa]fas fa-music[/fa][/div]
   [div=/*this is the start of the media player -- no need to edit ANY of this ever*/ height:100%; width:100%; padding:0; position:absolute; top:0; left:0; z-index:1; display:flex; align-items:center; justify-content:center; overflow:hidden; opacity:0.01%;][div=height:32px; width:32px; padding:0; position:relative; pointer-events:auto;]
      [comment]----soundcloud (replace the soundcloud link within media tag with your own)----[/comment]
      [div=height:80px; width:180px; padding:0; margin-top:-16px; margin-left:-14px; position:absolute; top:0; left:0;]
[media=soundcloud]https://soundcloud.com/xx_cold_seragaki_xx-43/cure-alien-stage[/media]
      [/div]

      [comment]----google drive (replace the google file code within media tag with your own)----[/comment]
      [div=transparent; height:500px; width:500px; margin-top:-170px; margin-left:-93px; padding:0px; /*remove this to use me, and add it to the other*/ display:none;]
[media=googledrive]1YLzmWVXtz1dH5xuIAwE-dOwyc5Lf1H80[/MEDIA]
      [/div]
   [/div][/div]
[/div]

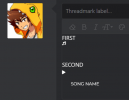
all that just gives you this:


the three important properties for this are position:relative/absolute;, z-index:1/2/3;, and pointer-events:auto/none;! a very simplified explanation of this is that the position property allows me to stack the play button and media players on top of each other, z-index allows me to arrange them in the correct order so that it's play button over media players, and pointer-events:none; ensures that your play button can't be clicked while your media players can.

there's an additional opacity:0.01% there that i've had to add in for music players where i can't add a background to the play button, which makes the media players BARELY opaque. which actually means the stacking isn't super necessary but. whatever! you don't have to touch anything on the media players themselves β€” overflow:hidden; hides most of their UI and because of how small the play button is,, they'll always be on top of each other!!! yay (οΈΆβ–½οΈΆ)

also, always remember to test both to make sure it works!

iiii don't know if that all makes sense! but hopefully it does....

no need to credit me or anything for this, but hope this helps someone add a little music player into their code if they need it!! that said, do be careful adding this into templates that aren't yours β€” this isn't really gonna look that pretty unless you know enough code to fit it into good places. i wouldn't really consider this frankensteining since it's just a snippet, but some others might!

for those who just want something to add to the ends of placeholder scrolls or whatever,

Code:
[div=
/*colour of the play button + song name. leave this blank if you're adding this to a scroll w. no background, so it works on light and dark mode!*/
--color-1: #fefefe;

height:auto; width:auto; display:flex; flex-flow:row nowrap; align-items:center; line-height:0;]
   [comment]----play button----[/comment]
   [div=height:auto; width:fit-content; width:-moz-fit-content; position:relative;][div= /*use this div to style your play button!*/ height:auto; width:auto; font-size:10px; line-height:100%; position:relative; pointer-events:none; color: var(--color-1);][fa]fas fa-play[/fa][/div]
      [comment]----media players----[/comment]
      [div=/*this is the start of the media player -- no need to edit ANY of this ever*/ height:100%; width:100%; padding:0; position:absolute; top:0; left:0; z-index:1; display:flex; align-items:center; justify-content:center; overflow:hidden; opacity:0.01%;][div=height:32px; width:32px; padding:0; position:relative; pointer-events:auto;]
         [comment]----soundcloud (replace the soundcloud link within media tag with your own)----[/comment]
         [div=height:80px; width:180px; padding:0; margin-top:-16px; margin-left:-14px; position:absolute; top:0; left:0;]
[media=soundcloud]https://soundcloud.com/xx_cold_seragaki_xx-43/cure-alien-stage[/media]
         [/div]

         [comment]----google drive (replace the google file code within media tag with your own)----[/comment]
         [div=transparent; height:500px; width:500px; margin-top:-170px; margin-left:-93px; padding:0px; /*remove this to use me, and add it to the other*/ display:none;]
[media=googledrive]1YLzmWVXtz1dH5xuIAwE-dOwyc5Lf1H80[/MEDIA]
         [/div]
      [/div][/div]
   [/div]
   [comment]----play button end----[/comment]

   [comment]----song name----[/comment]
   [div=height:auto; flex:1; color: var(--color-1); margin-left:15px; font-size:12px;][font=Montserrat]SONG NAME[/font][/div]

[/div]


SONG NAME


this will probably be my last post here for a bit, because i can't think of anything else related to customising that i haven't covered. might return with some small snippets for beginner coders to pick up, but i'm not sure yet since i'm not great at explaining css well! ヘ(ο½₯_| we shall see! if you have any questions about stuff or other things you'd like a crash course on, please feel free to leave them in the thread β˜†


Last edited:
Hiii Uxie! First of all, you're a goddess, as per usual, this has all been excellent to read! Though I still do some coding, perhaps your teachings will help me attempt some more complicated stuff someday! (Though frankly I'm too smooth brain sometimes for some things. Which brings me to...)

I have a couple questions about the second music player snippet! I wanted to test it out, but I ran into a couple issues. The first most obvious one being that the "song name" aspect isn't lined up with the play button as it is in your post, and I can't tell if this is smooth brain moment or if I missed something 😭 (could be both tbh).

The other part was that no matter what I did, the play button didn't work? Which honestly maybe is me missing it with my mouse, I sometimes miss the button in general, but I'm not sure if it is? The first one worked just fine, so I'm unsure what I did to this one πŸ€”

Thank you in advance, and thank you again for sharing all your expertise and help! πŸ™

Here's a screenshot of what I'm talking about with the song name part:
music players.PNG


Edit: A fix has been provided, praise be to Uxie!
 
Last edited:
Hiii Uxie! First of all, you're a goddess, as per usual, this has all been excellent to read! Though I still do some coding, perhaps your teachings will help me attempt some more complicated stuff someday! (Though frankly I'm too smooth brain sometimes for some things. Which brings me to...)

I have a couple questions about the second music player snippet! I wanted to test it out, but I ran into a couple issues. The first most obvious one being that the "song name" aspect isn't lined up with the play button as it is in your post, and I can't tell if this is smooth brain moment or if I missed something 😭 (could be both tbh).

The other part was that no matter what I did, the play button didn't work? Which honestly maybe is me missing it with my mouse, I sometimes miss the button in general, but I'm not sure if it is? The first one worked just fine, so I'm unsure what I did to this one πŸ€”

Thank you in advance, and thank you again for sharing all your expertise and help! πŸ™

Here's a screenshot of what I'm talking about with the song name part:

hey! that was My Bad 😭
the only reason why it isn't aligned is due to the additional line breaks i added to organise the code.

adding line-height:0; to the first div or wrapping the whole thing in will fix that!! i've added the former to my original post ( ^Ο‰^ )
 
hey! that was My Bad 😭
the only reason why it isn't aligned is due to the additional line breaks i added to organise the code.

adding line-height:0; to the first div or wrapping the whole thing in will fix that!! i've added the former to my original post ( ^Ο‰^ )

Thank you so much!!! Once again you are an absolute godsend, I can't wait to Look Cool everywhere πŸ™ 😭 πŸ’• *add a bunch of other emojis here*
 
The other part was that no matter what I did, the play button didn't work? Which honestly maybe is me missing it with my mouse, I sometimes miss the button in general, but I'm not sure if it is? The first one worked just fine, so I'm unsure what I did to this one πŸ€”

I COMPLETELY MISSED OUT THIS PART?? do you mean the play button isn't working on the second code snippet?
 

Users who are viewing this thread

Back
Top